

If you’ve been running a Synology NAS for a while, you’ve probably seen the option to enable SSD cache. It sounds like a no-brainer — faster speeds, better performance, fewer bottlenecks. But after spending years tinkering with network infrastructure setups, both at home and in small business environments, I’ve learned that SSD caching on Synology is one of those features that can genuinely help in the right situation and quietly cause problems in the wrong one.
This isn’t a quick overview. By the end of this article, you’ll know exactly how SSD caching works on Synology, when it makes sense, when it doesn’t, and what the actual risks are — including one that most YouTube videos and forum posts skip entirely.
How SSD Caching Actually Works on Synology

Synology’s SSD cache sits between your spinning hard drives and the requests coming in from the network. When DSM detects that certain data is being read repeatedly, it copies that data to the faster SSD. Future requests for that same data get served from the SSD instead of waiting for the HDD’s mechanical arm to find it.
That’s read cache. Write cache works differently — data gets written to the SSD first, and the system later flushes it to the HDD in the background. Write cache can improve performance under heavy write loads, but it introduces a real risk we’ll cover shortly.
Synology supports both M.2 NVMe drives (in models with dedicated M.2 slots) and 2.5″ SATA SSDs installed in regular drive bays. The M.2 slots are separate from your storage bays, which is a big advantage since you’re not sacrificing drive capacity for cache.
What the Cache Actually Speeds Up
Here’s where things get specific — and where a lot of people get confused about what they’re buying into.
NVMe SSD cache on Synology improves random I/O performance. It excels at workloads like:
- Running virtual machines stored on the NAS
- Hosting databases (MySQL, MariaDB)
- Active iSCSI LUNs used by hypervisors
- Frequently accessed small files (thumbnails, metadata, config files)
What it does not meaningfully improve is large sequential file transfers. Copying a 20GB video project from your NAS to your editing workstation won’t be noticeably faster with cache enabled. The bottleneck there is your network bandwidth and the HDD’s sequential read speed — and HDDs are actually quite good at sequential reads. The cache gets bypassed or adds minimal value in these scenarios.
This distinction matters a lot. If your primary NAS use case is video editing, photo backups, or large media streaming, SSD cache probably won’t give you the performance jump you’re expecting.
The Risk Nobody Talks About: TBW Burnout
This is the hidden cost that rarely shows up in Synology tutorials, and it’s the one that’s bitten people the hardest.
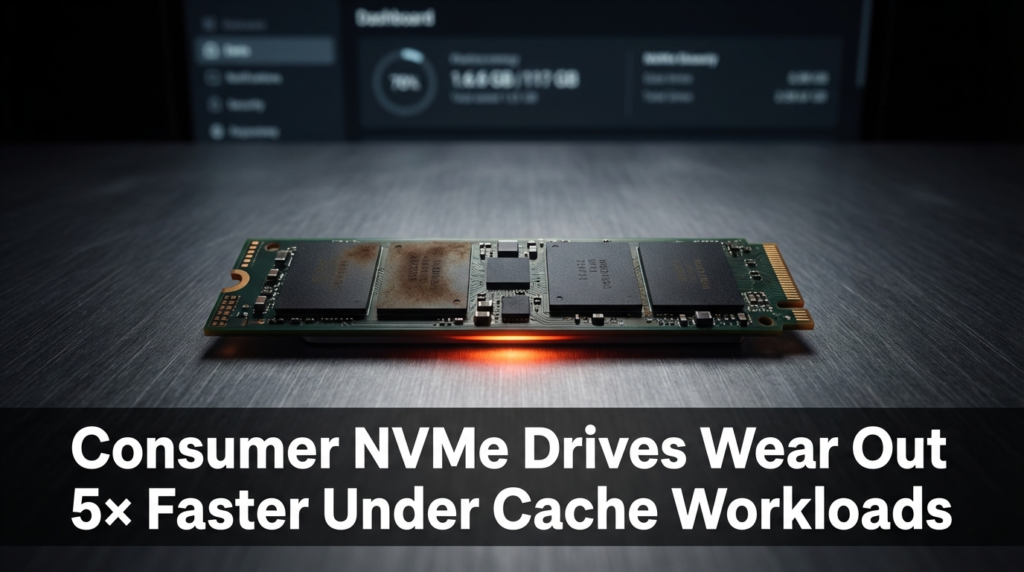
Every SSD — whether it’s a budget consumer drive or a mid-range NVMe — has a rated TBW, which stands for Terabytes Written. It’s the manufacturer’s estimate of how much data the drive can write before its flash cells start failing. A typical consumer NVMe drive might have a TBW rating anywhere from 150TB to 600TB depending on capacity and brand.
Under normal desktop use, hitting that limit takes years. Under Synology read-write caching, you can burn through it dramatically faster — up to 5 times faster than normal use according to Synology’s own SSD Cache White Paper (Synology SSD Cache White Paper). The reason is that caching creates constant small write cycles. Every time the system promotes data from HDD to cache, updates cache metadata, or flushes write cache back to disk, it writes to the SSD. On a busy NAS, this adds up fast.
Consumer NVMe drives were designed for workloads where large writes happen occasionally, not for the sustained, repetitive small writes that caching generates. Some users running busy home lab setups have reported their consumer NVMe drives hitting SMART warnings within 18 months of enabling read-write cache.
What you should do instead: If you’re serious about SSD caching on a busy system, use drives rated for higher write endurance — look for enterprise-grade or NAS-specific SSDs with higher TBW ratings. Synology’s own SNV3500 series and HAT5310-compatible SSDs are designed with this in mind. Monitor your drive’s TBW usage in DSM under Storage Manager > SSD Cache > Health Info. If you see the drive eating through terabytes written at an unusual pace, reconsider your cache mode.
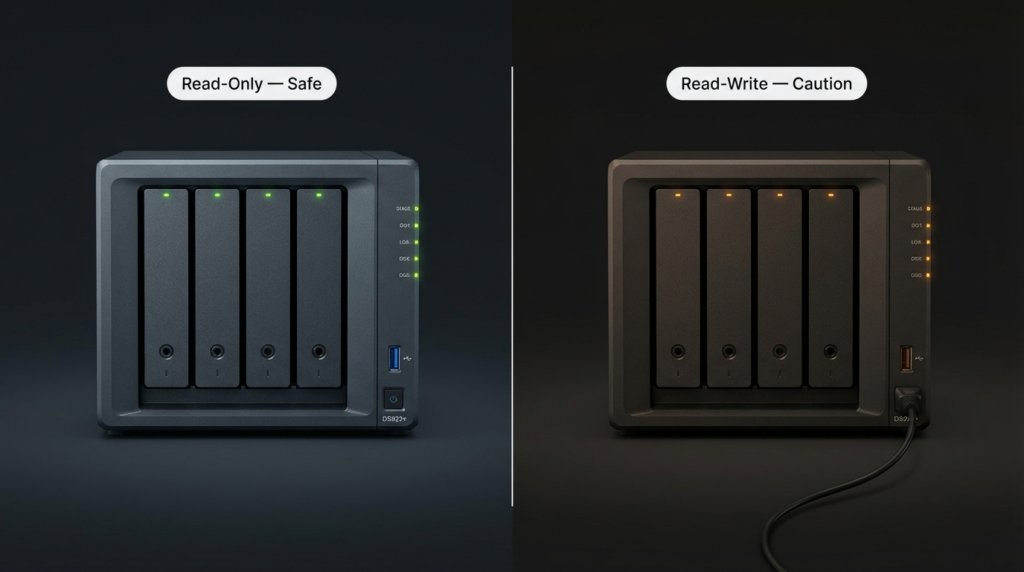
Read-Only Cache vs. Read-Write Cache: Know the Difference
This comparison is the most important decision you’ll make when setting up SSD cache.
| Feature | Read-Only Cache | Read-Write Cache |
|---|---|---|
| Performance Boost | Moderate (read speeds only) | Higher (reads and writes) |
| Risk of Data Loss | None | Yes — on sudden power failure |
| Drive Wear | Lower | Significantly higher |
| Recommended For | General NAS use | VMs, databases, iSCSI |
| Minimum Drives Required | 1 SSD | 2 SSDs (RAID 1 mirrored) |
| Good for Beginners | Yes | Use with caution |
Read-only cache is the safer choice for most home users and small offices. If the SSD fails or loses power suddenly, your data on the HDDs is completely unaffected. The cache just disappears — DSM rebuilds it over time as files get accessed.
Read-write cache is more aggressive. Data gets written to the SSD first before being committed to the HDD. If power cuts out in that window — before the flush happens — that data is gone. Synology requires two SSDs in RAID 1 (mirrored) for read-write cache precisely because of this, which reduces the chance of losing cache data if one drive fails. But a power outage still puts you at risk unless you have a UPS (Uninterruptible Power Supply).
I’ve seen a small business lose a day of database writes because they enabled read-write cache on a single SSD (on an older DSM version that allowed it), had a power flicker, and came back to a corrupted cache state. It wasn’t catastrophic, but it was avoidable. If you use read-write cache, pair your NAS with a UPS — no exceptions.
Which Synology Models Support M.2 SSD Cache
Not every Synology NAS has M.2 slots. Here’s a general breakdown:
| NAS Category | M.2 Slot Support | Notes |
|---|---|---|
| DS923+, DS1522+, DS1621+ | Yes (2 slots) | PCIe 3.0 NVMe |
| DS720+, DS920+, DS1520+ | Yes (2 slots) | PCIe 3.0 NVMe |
| DS220+, DS423+ | Yes (2 slots) | M.2 NVMe |
| DS218, DS420j, DS220j | No | Entry-level, no M.2 slots |
| RS series (Rackmount) | Varies | Check specific model spec sheet |
If your model doesn’t have M.2 slots, you can still use 2.5″ SATA SSDs in regular drive bays for caching, but you’ll sacrifice a storage bay for it.
Setting Up SSD Cache in DSM: What to Expect
The process itself is straightforward. Go to Storage Manager, select SSD Cache, and click Create. DSM walks you through choosing your cache drive(s), selecting the storage pool or volume to accelerate, and picking between read-only or read-write mode.
A few things to pay attention to during setup:
- DSM will run a compatibility check on your SSD. Consumer drives sometimes generate warnings even if they technically work.
- Cache size is flexible — you can allocate part of an SSD for cache and leave the rest unused, though DSM uses the entire SSD for cache by default.
- After creation, the cache starts empty. You’ll see performance improvements gradually as frequently accessed data gets promoted to cache over several days to weeks of normal use. Don’t expect instant results.
DSM also has a sequential I/O skip feature that tells the system to bypass the cache for large sequential reads and writes. This is enabled by default and it’s smart — it prevents large file transfers from flushing your hot cache data with cold sequential data.
When SSD Cache Is Genuinely Worth It
After all the caveats, here’s when it actually makes a real difference:
Virtual machine storage — If you’re running VMs on your Synology via VMM or over iSCSI from Proxmox or ESXi, the random I/O pattern of VM workloads benefits significantly from cache. Boot times drop, disk I/O inside the VM feels more responsive, and snapshot operations run faster.
Active Surveillance Station setups — Synology’s Surveillance Station with multiple camera streams generates constant small read requests for playback and motion detection. Cache smooths this out considerably.
Collaborative small office environments — When 10-20 users are constantly hitting the same shared files (office documents, project folders, shared templates), read cache helps reduce HDD seek times on frequently accessed content.
Home media servers with metadata-heavy apps — Plex, Jellyfin, and similar apps constantly read metadata, thumbnails, and artwork files. These are small random reads — perfect cache candidates.
When SSD Cache Probably Won’t Help You
- Your main use is large media file storage (4K video, raw photos, large archives)
- You have fewer than 4-6 drives in your pool (smaller pools have lower random I/O contention anyway)
- Your network is the bottleneck — if you’re on 1GbE, your NAS can already feed data faster than the network can carry it
- You only access the NAS occasionally or for backups
In these cases, the SSD slot is genuinely more valuable as additional storage or left empty.
Frequently Asked Questions
Does SSD cache increase the risk of data loss on my NAS? Read-only cache carries no data loss risk — if the SSD fails, DSM simply rebuilds the cache from HDD data. Read-write cache does carry risk during sudden power failure before the write buffer is flushed to disk. Pairing your NAS with a UPS largely eliminates this risk.
Can I use any NVMe SSD for Synology cache? Technically yes, but Synology recommends drives on their compatibility list. Consumer NVMe drives work but wear out faster under cache workloads. For a heavily used system, drives with higher TBW ratings are a smarter investment.
How much RAM does SSD cache need to work well? SSD cache performance is partly tied to DSM’s cache metadata, which lives in system RAM. Synology recommends at least 1GB of RAM per TB of SSD cache. If your NAS is RAM-limited, upgrading RAM before adding SSD cache is the better move.
Will SSD cache speed up my 4K video streaming from the NAS? Not meaningfully. Large sequential reads like video streaming are mostly handled by HDD sequential throughput and network bandwidth. SSD cache helps random I/O workloads, not large file transfers.
Wrapping Up
SSD caching on Synology is a well-designed feature that works as advertised — but only for the right workload. The M.2 slots on Synology’s plus-line models are genuinely useful if you’re running VMs, databases, or a multi-user environment with heavy random access patterns. For most home users doing media storage and occasional backups, the slot might serve you better as extra storage.
The two things worth carrying away from this article: consumer NVMe drives burn through their write endurance faster under cache workloads than most people realize, and read-write cache without a UPS is a data integrity gamble. Neither of these is a reason to avoid the feature — they’re just reasons to go in with your eyes open.
If you’re on the fence, start with read-only cache using a single drive. Watch your SMART data over a few months. If the performance gain is real for your workload, great. If not, you can repurpose the drive. That’s a more measured approach than the “just enable it and forget it” advice you’ll find in most setup guides.


