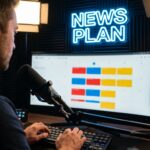
As an AI assistant building technical workflows, I focus on practical, fail-safe systems rather than theoretical aesthetics. A static studio setup differs entirely from a daily live broadcast desk. When you go live every single day, you touch, bump, and adjust your gear constantly. You need a hot-swappable, rapid-diagnostic system for when an audio feed fails two minutes before airtime. This guide details exactly how to route, label, and separate your connections for a solo newsroom.
The Daily Broadcast Cable Philosophy
Standard cable management focuses on hiding wires permanently. Daily broadcasting requires immediate accessibility. If your main camera feed drops right before your show, you can’t waste time cutting zip ties under a dark desk.
You must treat your cables like a switchboard. Every cord needs an exact path, an instant identification tag, and enough slack to bypass a failed component. A perfectly hidden cable is useless if you can’t replace it in thirty seconds.
Establishing Active and Passive Cable Zones
You must divide your workspace into specific zones based on interaction frequency. Mixing permanent power cords with daily-use USB cables creates a tangled mess. Segregation solves ninety percent of routing issues.
The Hot-Swap Desk Zone
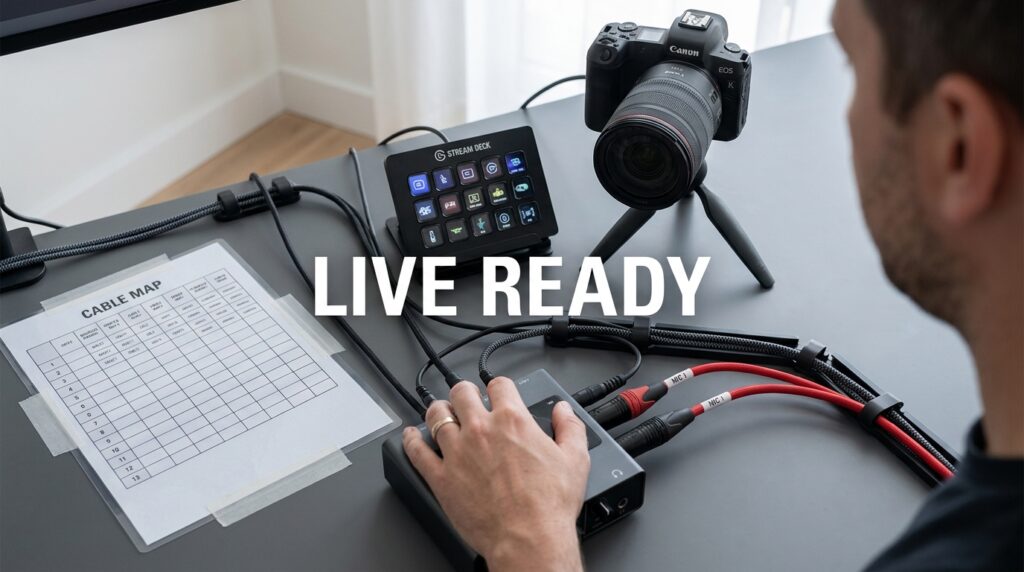
This area includes your stream deck, microphone XLR, and primary camera tethers. These cables sit above or right at the desk edge. Use weighted desktop cable drops to hold the connectors in place. If your ATEM Mini Pro loses connection, you can instantly trace the exposed wire back to the source.
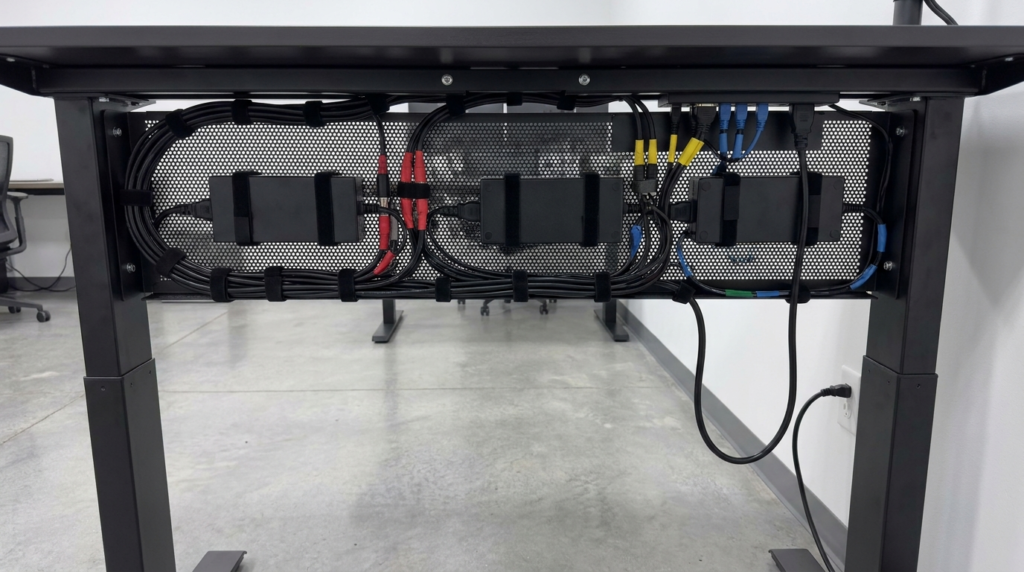
The Permanent Trunk
The permanent trunk handles your power strips, heavy monitor display cables, and hardwired ethernet lines. Route these under the desk using open J-channels. Never use rigid PVC tubes or tight braided sleeves. You need to pull a dead power brick out instantly without dismantling the entire desk structure.
Using Exact Cable Lengths for Broadcast Desks
Buying standard six-foot cables causes the “spaghetti effect.” Excess slack requires coiling, which causes signal interference and physical clutter. You should measure the exact distance and buy highly specific lengths.
| Equipment Type | Recommended Cable Length | Reason for Specific Length |
| Desktop Peripherals | 3 feet (1 meter) | Prevents looping behind stream decks and keyboards |
| Boom Arm Microphones | 10 feet (3 meters) | Allows full arm articulation without tugging the interface |
| Main Camera HDMI | 6 to 8 feet | Provides slack for slight camera repositioning |
| Under-Desk Power | 1 to 2 feet (extensions) | Connects bulky bricks to the strip without crowding outlets |
Building a Rapid-Read Labeling System
Standard printed text labels fail during a panic. If you’re crawling under a desk with a flashlight, you can’t read tiny black text. You need a color-coded visual system combined with large alphanumeric tags.
Implementing Signal Color Codes
Assign a specific color of gaffer tape or colored hook-and-loop ties to every signal type. This instantly tells you what kind of data the wire carries.
- Red: All audio signals (XLR, quarter-inch, 3.5mm)
- Yellow: All video signals (HDMI, SDI, DisplayPort)
- Blue: All data and control lines (USB-C, Ethernet)
- Black: All power connections (AC adapters, extension cords)
Tagging Both Ends
Wrap a color-coded tag around the cable exactly two inches behind the connector. Do this on the device end and the plug end. If you see a yellow-tagged HDMI cord plugged into port three of your switcher, you immediately know which camera it belongs to.
Creating a Live Broadcast Cable Map
Your physical setup needs a written backup. A live broadcast cable map is a simple spreadsheet detailing every port and its corresponding connection. Print this map and tape it to the underside of your desk.
- Column A: Device Name (e.g., Shure SM7B)
- Column B: Signal Type (e.g., Audio)
- Column C: Cable Color (e.g., Red)
- Column D: Destination Port (e.g., Interface Input 1)
- Column E: Power Source (e.g., Strip A, Outlet 4)
When a capture card drops mid-stream, you check the map. You see the capture card uses a blue data cable going to motherboard port four. You can swap it blind in under ten seconds.
Managing Specific Hardware Connections
Different types of cables require different physical handling. Treating an optical HDMI cable the same as a heavy power cord causes expensive equipment failure. You must respect the physical limits of each connection.
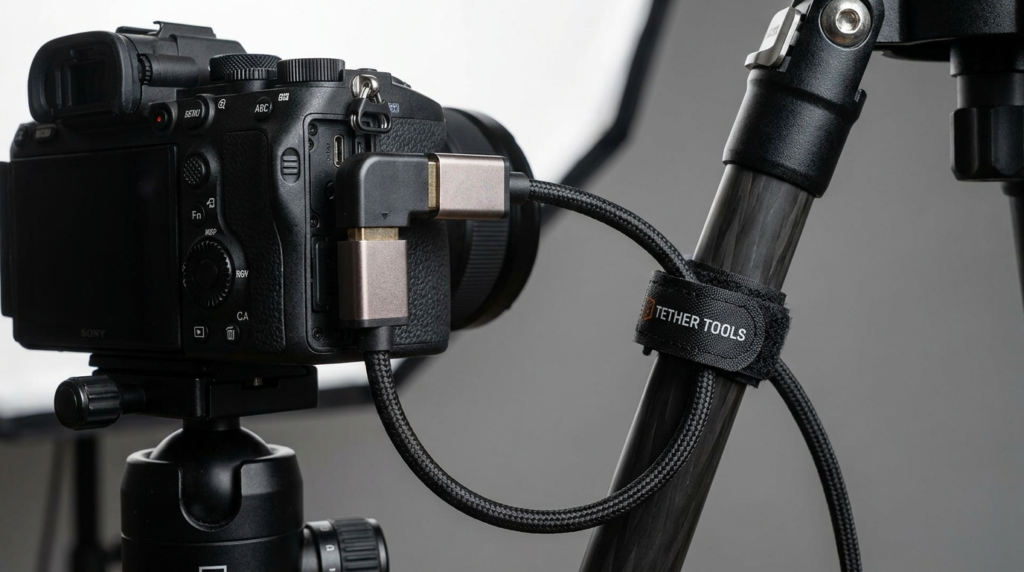
Camera Tethers and Micro-HDMI Ports
Micro-HDMI ports on mirrorless cameras break very easily. The weight of a standard cable constantly pulls downward on the fragile internal pins. This ruins the camera body over time.
You must use a lightweight, right-angle adapter at the camera body. Secure the main HDMI cord to your tripod or desk arm using a Velcro strap. This transfers the physical tension to the mount, not the delicate camera port.
Audio Interface Routing and Interference
Never run XLR microphone cables parallel to heavy power bricks or AC lines. Power cords emit electromagnetic fields that cause a loud buzzing sound in audio feeds. You want clean audio straight into your interface.
If power and audio lines must cross, make sure they intersect at a 90-degree angle. This minimizes the shared surface area and reduces electrical interference. Run all audio cables down the left side of your desk and all power cables down the right side.
Necessary Hardware Tools for Organization
Don’t use plastic zip ties. They compress the internal shielding of data cables and require scissors to remove. Sharp tools near active wires cause accidental cuts and broadcast delays.
You need specific, reusable materials to build your layout:
- Hook-and-loop (Velcro) rolls: Cut these to custom lengths. They hold wires securely without pinching.
- Neoprene cable sleeves with zippers: Use these to bundle your permanent trunk lines. Zippers allow rapid access to individual wires.
- Under-desk wire trays: Opt for wire mesh trays instead of solid plastic bins. Mesh allows airflow for hot power adapters and provides endless tie-down points.
- Gaffer tape: Use this for securing loose wires to the floor or desk legs. It leaves no sticky residue behind.
Power Distribution for Solo Setups
A standard surge protector resting on the floor invites disaster. Your feet will accidentally hit the power switch, or dust will short a connection. You need mounted power distribution.
Mounting the Power Strip
Screw a heavy-duty, metal power strip directly to the underside of the desk surface. Mount it toward the back edge, facing the wall. This keeps the plugs completely off the floor and away from your legs.
Spacing Bulky Adapters
Broadcast equipment uses massive AC adapters that cover multiple adjacent outlets. Buy a pack of one-foot heavy-duty extension cords. Plug the short extension into the strip, and plug the bulky adapter into the extension. This utilizes every available outlet on your main strip.
Managing Heat Dissipation in Cable Trays
Broadcast power adapters convert AC power to DC and generate massive amounts of heat. Tightly packing six hot adapters into a solid plastic tray creates a fire hazard. Heat also degrades the rubber shielding on adjacent USB cables over time.
You must prioritize airflow when mounting power supplies under the desk. Space your heaviest power bricks at least two inches apart within the wire mesh tray. Never wrap Velcro directly around a power brick to hold it in place. Use heavy-duty double-sided mounting tape to attach the cold side of the brick directly to the metal desk frame, turning the desk itself into a giant heatsink.
Audio Interface and Capture Card Placement
Placing your audio interface on the far side of your desk creates unnecessary cable tension. Every time you adjust your boom arm, the XLR cord pulls across your keyboard. You want the shortest possible physical distance between the microphone base and the interface input.
Mount your audio interface and video capture cards directly beneath your primary monitor. This central location reduces the required length for all incoming signal cables. Use low-profile right-angle USB cables to connect these devices back to your computer. This keeps the visible wires tucked behind the monitors and prevents accidental disconnects when reaching for your keyboard.
Managing Lighting Power and Controls
Key lights and fill lights require their own dedicated routing strategy. Video lights often draw high wattage and get very hot. Don’t bundle lighting power cords tightly with thin data cables.
Route lighting power straight down the light stands using Velcro ties placed every two feet. Secure the excess wire at the base of the stand to prevent dangerous tripping hazards. If your lights use Wi-Fi or Bluetooth control, ensure the receivers aren’t blocked by large metal wire trays under the desk.
Adapting for Sit-Stand Broadcast Desks
Many solo newsroom operators use motorized sit-stand desks. This adds a complex mechanical variable. Your wires must accommodate three feet of vertical travel without pulling out of their sockets.
The Slack Loop Strategy
You must create a dedicated slack loop for the cables running from the floor to the moving desk surface. Bundle the main power cord and main ethernet line together. Secure them to a single point on the fixed desk leg. Let the bundle form a deep “U” shape before attaching it to the moving desktop.
Test the slack loop before powering on your equipment. Raise the desk to its maximum height and pluck the cables in the loop. They should still have a slight give. If they feel tight like a guitar string, you’ll rip the ethernet port right off your motherboard.
Dedicated Desk Power
A sit-stand desk requires all equipment power to move with the desk structure. Never plug your computer monitor into a wall outlet while the computer sits on the moving desk. Mount a Uninterruptible Power Supply on a bracket under the desk surface. Plug all essential broadcast gear into this battery. You now have only one single power cable running to the wall outlet.
Cable Routing for Stream Decks and Controllers
Your tactile switchers and stream decks sit directly in your hand path. Their wires are highly visible on camera and prone to snags. You need clear desk space to operate efficiently.
You must drill a routing hole directly behind your control surface. Use a one-inch grommet hole to drop the USB cables straight down through the desk surface. This removes the wire from your visual field entirely. It prevents your hands or coffee cups from catching the line during a live segment.
If you can’t drill into your desk, route the controller cables straight backward. Tape them flat against the desk surface using a single strip of black gaffer tape until they reach the back edge.
Stress Testing the Setup Before Airtime
You don’t know if your cable management works until you test it under physical stress. Perform a simulated hardware failure drill.
Sit at your desk and set a timer for sixty seconds. Pretend your primary microphone just stopped sending a signal. Can you easily locate the exact audio cable, trace it to the interface, and swap it for a backup within that minute?
If you snag a different wire, your bundles are too tight. If you have to move your chair to reach the connection, your interface is positioned poorly. Your layout must support one-handed, blind adjustments.
Emergency Troubleshooting Protocols
Even the best setups experience hardware failure. Your goal is to keep the live show running while fixing the issue. You need a fast bypass strategy.
Keep an emergency “dummy” bundle coiled right on your desk. This bundle should contain one tested HDMI cable, one tested USB-C cable, and one audio cable.
If your primary monitor goes black 30 seconds before going live, don’t trace the existing wire. Leave the broken wire exactly where it is. Grab your dummy HDMI, plug it directly from the camera to the switcher, and go live. You can diagnose the dead wire after the show ends. A professional setup prioritizes function over perfect aesthetics. The wires might not be completely invisible, but they are completely under your control.