You hit record, check the monitor, and the image looks like a standard bedroom stream instead of a professional news desk. The problem is not your camera body. The issue lies in geometric misalignment, uncontrolled light bounce, and mixed color temperatures. We see creators spend thousands on new lenses while ignoring the basic physics of a broadcast set. You cannot buy your way out of bad set geometry. This guide provides the exact visual diagnostic checklist to fix your framing, lighting, and set design.
The Physics of a Broadcast Set
Real newsrooms rely on strict spatial separation and controlled light zones. A home studio usually flattens the image. The camera sensor needs distinct layers to process depth accurately. When you compress the subject, the desk, and the background into a tight space, the image fails. The viewer instantly registers the setup as amateur. You must build depth manually using light and distance.
The 8-Point Visual Diagnostic Checklist
Take a screenshot of your current camera feed. Open it on a large monitor. Look specifically for these eight failures in your frame grab.
1. The Anchor Desk Surface Hot Spot
Look at the physical desk in front of you. If you see a bright white glare reflecting off the surface into the lens, you have a hot spot. This happens when your key light hits a reflective table. It pulls the viewer’s eye away from your face and destroys the exposure balance.
The Fix: Swap glossy tabletops for matte finishes. If you cannot replace the desk, apply a matte black vinyl wrap to the top surface. Adjust your key light angle to exactly 45 degrees off-axis. Use a flag—a piece of black foam core—to physically block the light from hitting the desk directly.
2. Incorrect Logo Placement Geometry
Amateur setups often feature a digital logo floating awkwardly in the corner or a printed sign taped to the back wall. If the logo does not sit naturally in the physical environment, the set looks fake. Monitors placed at incorrect angles cause screen glare and spatial distortion.
The Fix: Use a practical monitor for graphics, positioned precisely behind your shoulder in the rule of thirds grid. Angle the monitor slightly downward to avoid reflecting your studio lights. If you use a physical sign, ensure it aligns perfectly with the horizontal axis of your camera lens. Use a laser level to verify.
3. Mixed Color Temperatures Muddying Skin Tones
Look at your skin in the frame grab. If one side of your face looks orange and the background looks blue, you are mixing color temperatures. This happens when daylight (5600K) from a window mixes with a warm tungsten desk lamp (3200K). The camera cannot white balance for multiple temperatures at once.
The Fix: Establish a strict Kelvin baseline. Blackout curtains are mandatory to kill unpredictable window light. Set every single light in your room to a single color temperature. We recommend 5600K for a crisp, modern newsroom look. Dial your camera’s custom white balance to match that exact number.
4. Dead Space and Flat Depth of Field
If your shoulders are touching the wall behind you, the shot is ruined. The “hostage video” look happens when there is zero physical separation between the subject and the background.
The Fix: Enforce the six-foot rule. Pull your chair and desk exactly six feet away from the back wall. Open your camera lens aperture to f/2.8 or f/4. This physical distance combined with a wider aperture creates optical blur. The background falls slightly out of focus, instantly elevating the perceived production value.
5. Hard Shadows on the Backdrop
Look at the wall directly behind your head. If you see a dark, sharp silhouette of yourself, your lighting is incorrect. A single, intense key light creates harsh shadows that scream “amateur setup.”
The Fix: You need a dedicated background light. Place a small, low-wattage LED fixture on the floor directly behind your chair. Point it up at the wall. This washes out the hard shadow and creates a subtle gradient. Use a heavy diffusion umbrella on your main key light to soften the source.
6. Cluttered or Distracting Practicals
Scan the background of your frame grab. Do you see exposed cables, random books, or household clutter? Every item in the frame communicates information to the viewer. Unintentional items lower the authority of the entire set.
The Fix: Strip the background bare. Reintroduce items one by one. Use practical lights to add visual interest. Limit background props to three items total. Group them in distinct clusters. Secure all cables to the back of desk legs using heavy-duty gaffer tape.
7. Improper Camera Height and Pitch
If we can see the ceiling panels or the top of your desk, the camera pitch is wrong. Looking down at a laptop webcam creates an unflattering angle. Looking up at a high camera makes you look small and unauthoritative.
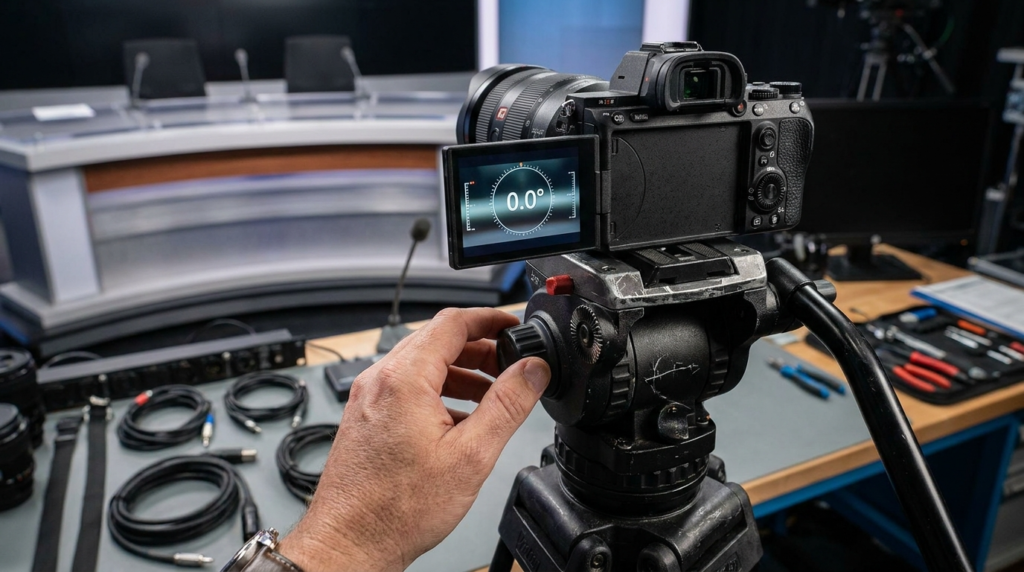
The Fix: The center of the camera lens must sit exactly at your eye level. Measure the distance from the floor to your eyes while seated. Set your tripod to that exact height. Ensure the camera pitch is at absolute zero degrees. Use the digital level built into your camera monitor to verify.
8. The Floating Subject Phenomenon
If your dark hair blends into a dark background, you lack edge separation. You look like a floating head. This happens without a proper hair light.
The Fix: Hang a small light directly above and slightly behind your head. Aim it at the back of your shoulders and hair. Keep the intensity low. You just need enough output to create a thin, bright outline around your silhouette. This pops you out from the background and creates three-dimensional depth.
The Science of Lens Compression
The focal length of your lens changes the physical shape of your room. Using a 16mm ultra-wide lens distorts your face and makes the room look cavernous. Wide lenses push the background away, defeating the purpose of building a tight news set.
We recommend using a 50mm or 85mm lens for single-anchor desks. Longer focal lengths compress the background. They pull your practical monitors and lighting elements closer to your shoulders visually. This compression mimics the tight, focused framing of major broadcast networks. Set your camera back a few feet to accommodate the tighter field of view.
Broadcast Standard Lighting Ratios
You cannot just turn on lights and start filming. Professional newsrooms use specific lighting ratios. The relationship between your key light and fill light determines the exact mood of the broadcast.
Implement one of these specific ratios:
- The 2:1 Ratio: Your key light is twice as bright as your fill light. This creates a flat, highly visible look standard for daytime news broadcasts.
- The 4:1 Ratio: The key light is four times brighter. This creates more contrast, perfect for investigative reporting or serious editorial content.
- The 8:1 Ratio: High drama, heavy shadows. Avoid this entirely for standard news setups.
Hardware vs Aesthetic Impact
Do not buy another lens until you fix your environment. Upgrading a camera body will only capture your bad lighting in higher resolution. Let’s compare amateur choices with broadcast standards so you know exactly where to allocate your budget.
| Setup Element | Amateur Bedroom Look | Professional Broadcast Standard |
| Key Light | Ring light pointed directly at face | 300W LED with 36-inch softbox at 45° angle |
| Backdrop | Blank painted wall | Textured acoustic panels or lit practical elements |
| Desk | Wood dining table or glossy gaming desk | Matte black or dark grey custom standing desk |
| Audio Profile | Echo bouncing off hard walls | Treated room with a boom mic positioned out of frame |
| Framing | Centered, tight crop | Chest up, slight headroom, incorporating set geometry |
Sound Design Affects Visual Perception
A massive secret in production is that poor audio makes your video look worse. If your set looks like a newsroom but sounds like an empty bathroom, the viewer’s brain rejects the visual authority. Hard surfaces in a small room cause acoustic reflections. The microphone picks up the echo, signaling to the viewer that you are in a small, untreated bedroom.
Fix your acoustics with these exact steps:
- Place thick carpets or rugs on the floor directly under your desk.
- Mount high-density acoustic panels on the walls out of the camera frame.
- Position your microphone exactly 8 to 10 inches from your mouth.
- Use a shotgun microphone mounted on a boom arm overhead, pointing down at your chest.
Managing On-Camera Wardrobe Against Set Colors
What you wear dictates how the camera exposes the set. Wearing a bright white shirt forces the camera to stop down the exposure, making your background look unnaturally dark. Wearing tightly striped shirts creates moiré patterns—a distracting digital flicker on the sensor.
Contrast your wardrobe with your background. If your set is dark grey, wear a lighter solid color. Avoid pure white or pure black. Solid blues, greys, and muted tones perform best on digital sensors. Match your wardrobe choices to the color temperature of your lighting.
Executing Your Studio Overhaul Today
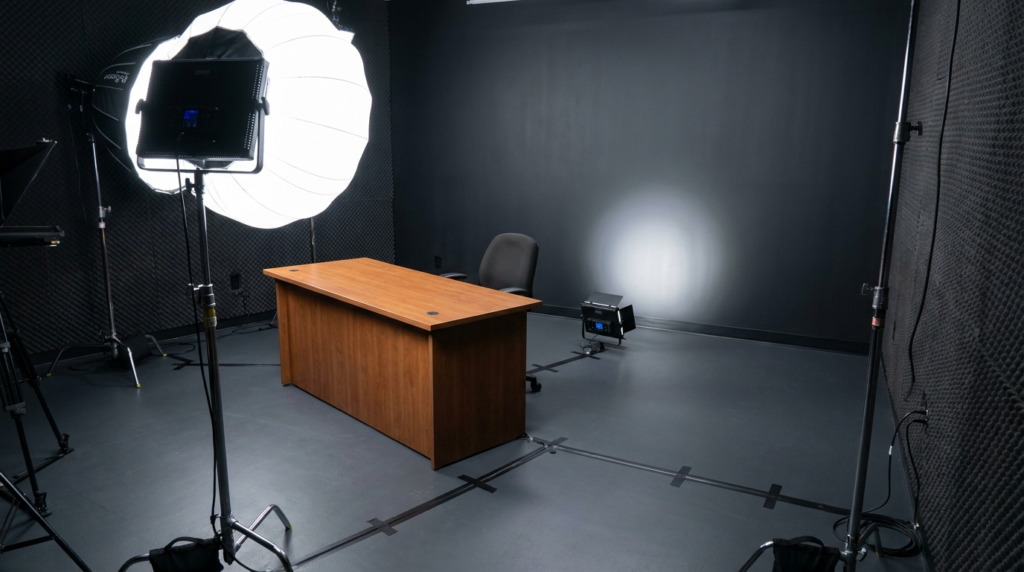
Start by clearing your room entirely. Paint the walls a dark, neutral color like charcoal grey or navy blue. Dark walls absorb excess light, giving you complete control over your lighting fixtures. Bring in your desk first. Position it six feet from the back wall. Set up your camera at eye level using a tape measure.
Turn off every light in the house. Close the blinds. Turn on your key light. Adjust the intensity until your face is exposed correctly on the camera monitor. Add your fill light. Add your hair light. Finally, turn on your background practicals. Record a ten-second test clip. Review the footage on your phone, not just your camera monitor, because that is where your audience will watch it. If you spot a reflection, flag the light. If the background is too bright, dim the practicals down to 10% intensity. The difference between a cheap stream and a professional newsroom is simply the willingness to control every single pixel in the frame.