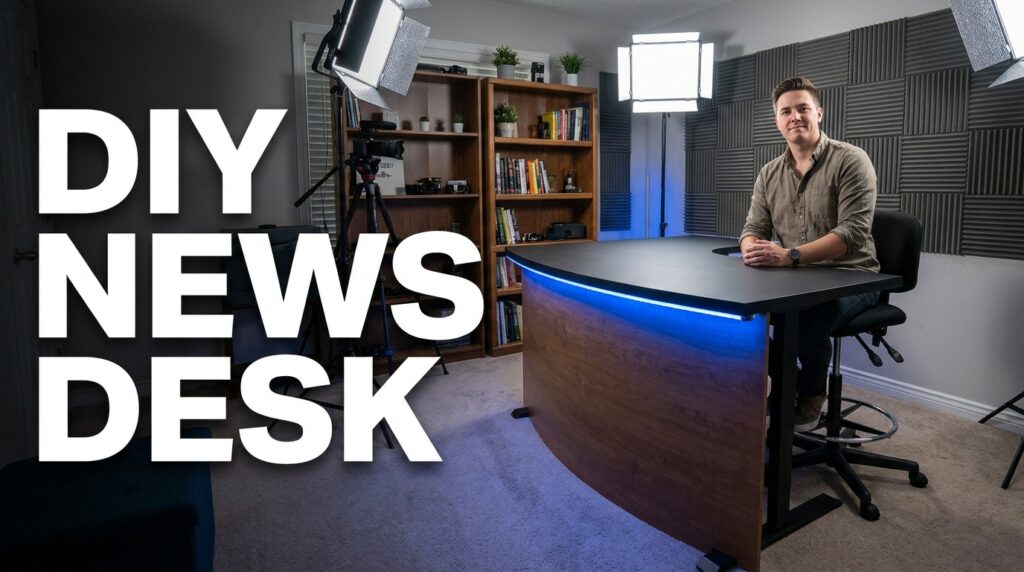
You want a news anchor desk, but local TV station sets cost thousands of dollars. Sticking a standard office desk in front of a camera just looks like a cheap podcast. The secret to a broadcast-style desk is not the material. It is the specific visual geometry: the height of the surface, the distance to the camera, and the curve of the front facade. I will show you exactly how to build a professional anchor desk for under $300 using basic parts from IKEA and the hardware store.
The Visual Geometry of a True News Desk
Most home studio builders fail right at the beginning. They sit at a standard 29-inch high computer desk. A traditional broadcast desk forces a specific posture and spatial relationship with the lens.
The Standing-Height Illusion
News anchors do not sit in standard office chairs. They sit on drafting stools. The desk surface is actually at bar height. This forces the spine straight and drops the shoulders.
It creates a commanding presence on camera. We need a desk surface sitting exactly 40 to 42 inches off the ground.
The Camera Sight-Line Calculation
Your camera lens needs to hit the desk at a very specific angle. If the camera is too high, the desk looks flat. If the camera is too low, you look like a giant.
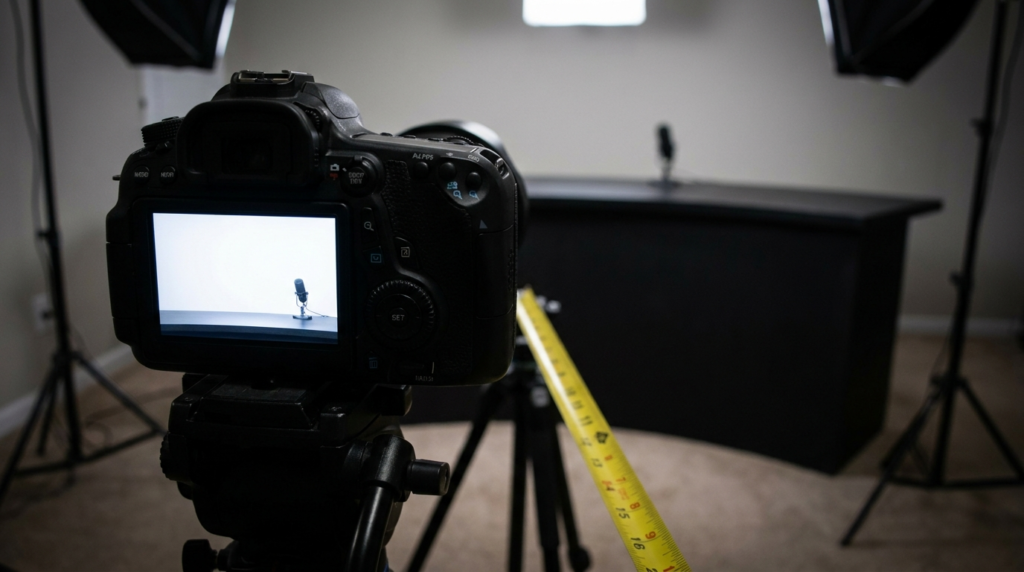
For a standard 16:9 frame shot from 6 feet away, the camera lens should sit at 45 inches off the floor. This provides a slight downward tilt. It captures the top surface of the desk while still revealing the front facade.
Here is the baseline comparison for framing a shot.
| Metric | Standard Office Desk | Broadcast Anchor Desk |
| Desk Height | 29 inches | 40 – 42 inches |
| Chair Type | Office Chair | Drafting Stool (30″ seat) |
| Camera Height | 36 inches | 45 inches |
| Front Facade | Flat/Exposed Legs | Curved Hardboard |
| Lens Angle | Straight | 5-Degree Downward Tilt |
The $300 Hardware Store and IKEA Supply List
We will use a modular approach for the build. You do not need advanced woodworking skills or heavy machinery. You just need a drill, some wood screws, and a tape measure.
Sourcing the Desktop and Legs
IKEA makes this easy with their customizable table systems. We avoid custom wood cuts for the main surface to save time and money.
- LAGKAPTEN Tabletop (IKEA): The 55×23 inch size is perfect for a single-anchor setup. It provides enough width for the camera frame to pan slightly without revealing the edges.
- OLOV Adjustable Legs (IKEA): You need four of these. They extend up to 35.3/8 inches. We will boost them later to hit our 40-inch height target.
- 1/8-inch Tempered Hardboard (Home Depot): This is the magic material. It bends easily without snapping. We will use this thin board for the curved front facade.
- 2×4 Pine Studs (Home Depot): Get three standard 8-foot studs. We use these rough pieces for the hidden internal framing.
Strict Budget Breakdown
Prices vary slightly by region, but here is the typical cost structure for this specific build.
| Item | Store | Quantity | Estimated Cost |
| LAGKAPTEN Top | IKEA | 1 | $50.00 |
| OLOV Legs | IKEA | 4 | $60.00 |
| 1/8″ Hardboard | Home Depot | 1 sheet | $15.00 |
| 2×4 Pine Studs | Home Depot | 3 | $12.00 |
| Matte Black Paint | Hardware Store | 1 Quart | $18.00 |
| 1-inch Wood Screws | Hardware Store | 1 Box | $8.00 |
| LED Strip Light | Amazon | 1 | $20.00 |
| Total | $183.00 |
We are well under the $300 limit. This leaves plenty of room in the budget for tax, a good paintbrush, and a used drafting stool.
Constructing the Internal Riser Frame
The OLOV legs only reach about 35.5 inches at their maximum extension. We need the final desk surface at 40 inches. We solve this by building a small wooden riser platform on the floor.
Measuring and Cutting the Base
Take your 2×4 studs. Cut them to create a rectangular box that is 45 inches wide and 18 inches deep. This box will sit flat on the floor.
The IKEA legs will rest directly on top of this wooden box. Drill the pieces together using your wood screws. This frame does not need to look pretty because it will be completely hidden behind the front facade.
Securing the Desk Legs
Place the LAGKAPTEN tabletop upside down on the floor. Attach the four OLOV leg plates to the bottom. Position them exactly 2 inches in from the edges.
Screw the legs into the metal plates. Adjust all four legs to their maximum height. Flip the desk over carefully. Place the bottom of the legs onto your 2×4 wooden riser. You now have a solid desk standing exactly at broadcast height.
Creating the Broadcast Curve
A flat desk looks like a folding table at a bake sale. Local news desks always have a curved or aggressively angled front panel. It catches studio lighting perfectly and hides the talent’s knees.
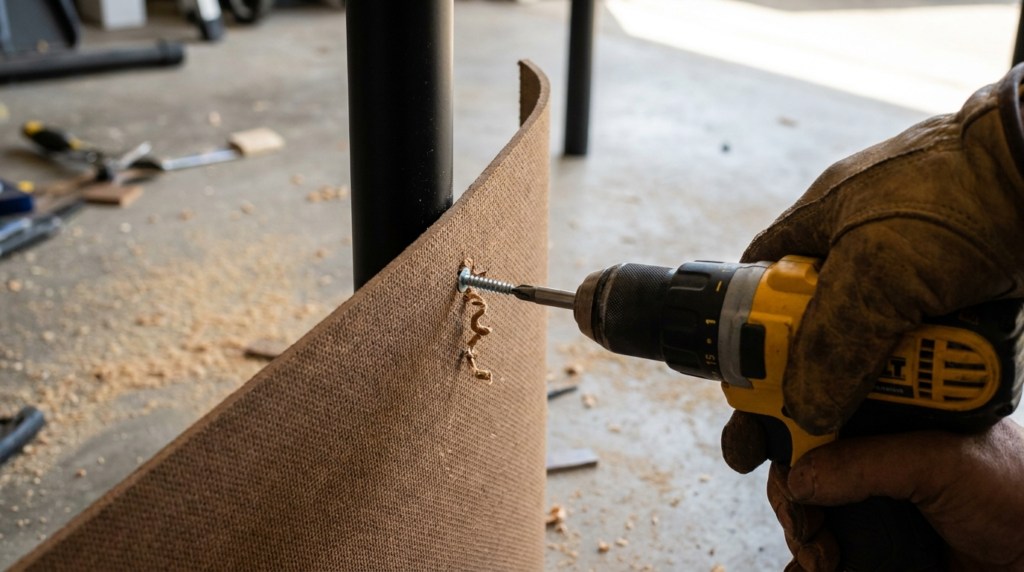
Bending the Hardboard
We use the 1/8-inch hardboard because it is incredibly flexible. Cut a piece that is 38 inches high and 60 inches wide.
You want the board to bow outward toward the camera lens. Secure the left edge of the hardboard to the left front leg of the desk. Drive three wood screws through the board directly into the metal leg.
Fixing the Tension
Carefully push the right side of the hardboard toward the right leg. The center of the board will buckle and bow outward, creating a smooth curve. Secure the right edge to the right leg with three more screws.
The curve hides the straight IKEA legs. It hides your rough 2×4 riser box on the floor. It transforms the cheap parts into a solid, heavy-looking architectural piece.
The 4-Inch Overhang Rule
Look closely at a desk on a major cable news network. The top surface always overhangs the front facade by a few inches. This is not just a stylistic choice.
Hiding the LED Strips
The overhang creates a deep shadow line. It gives you a physical lip to hide LED light strips from the camera’s view. Our curved hardboard sits flush against the front legs.
The LAGKAPTEN top is wider than the leg placement. This naturally leaves a 2-to-3 inch overhang on the front. Take your LED strip light. Peel off the adhesive backing. Stick the strip directly underneath that overhanging lip.
Lighting the Curve
Point the LED strip slightly downward. When you turn it on, the light washes straight down the curved hardboard. This creates a brilliant gradient effect on camera.
It separates the desk from the dark background. Flat front panels bounce light right back into the lens. The curved panel diffuses the LED glow evenly across the room.
Treating the Surfaces for Camera
Cameras hate shiny things. A raw IKEA desktop will reflect your overhead studio lights right into the lens. This creates ugly white glare spots on your broadcast.
The Matte Paint Fix
We must kill all reflections to maintain the professional illusion. Take your quart of matte black paint. Paint the curved hardboard front. The matte finish absorbs ambient light and makes your LED gradient look richer.
You can also wrap the hardboard in a cheap vinyl wood texture. Wood textures look great on camera, but ensure the vinyl has a matte finish. Avoid glossy contact paper at all costs.
Dealing with the Desktop
The LAGKAPTEN top has a slight factory sheen. If your overhead key light reflects off it, you must cover the surface immediately.
You can buy a large, matte-black desk mat. A heavy felt or neoprene mat absorbs light instantly. It also stops your keyboard or mouse from making loud scraping noises near your microphone.
Studio Placement and Depth of Field
Do not push this newly built desk up against a wall. A professional newsroom set requires physical depth.
Setting the Background Distance
Pull the desk at least 4 to 6 feet away from your back wall. This physical distance allows the background to fall slightly out of focus. It creates a professional depth of field that phone cameras struggle to replicate.
If you sit right against the wall, harsh shadows from your head will ruin the shot. Distance kills shadows.
Final Camera Framing Checklist
Sit at the desk on a tall drafting stool. Position your camera exactly 6 feet away from the front curve. Set the lens height to 45 inches on your tripod.
Check your monitor. You should see the top of the desk. You should see the illuminated curved front. The camera frame should cut off right below your chest.
Professional Cable Routing
A real broadcast desk looks entirely self-contained. You cannot have USB wires drooping down the sides. Exposed wires instantly ruin the illusion of a million-dollar studio.
Drilling the Grommet Hole
You need to run your keyboard, mouse, and microphone cables straight down through the wood. Buy a 2-inch hole saw attachment for your power drill.
Measure the exact center of your desk surface. Drill a hole about 4 inches from the back edge. Drop a plastic desk grommet into the hole to make the raw cut look clean.
Hiding the Wires
Route all your cables straight down through the hole. Since you have the curved hardboard front, the entire area under the desk is hidden from the camera.
Zip-tie the cables to the back of the metal IKEA legs. Run them down to a power strip resting on the 2×4 base platform. Only one single power cord should leave the desk area to plug into the wall outlet.
Acoustic Treatment for the Hollow Desk
We just built a hollow wooden box with a curved front. In a small room, this desk will act exactly like a bass drum.
Stopping the Boom
When you place your hands heavily on the LAGKAPTEN top, it will echo. Your broadcast microphone will pick up a low, boomy thump. This happens because the curved hardboard traps and amplifies sound waves.
We need to deaden the acoustic resonance of the entire structure.
Packing the Cavity
Go to a local shipping store or find leftover household materials. Get heavy moving blankets or cheap acoustic foam panels. Stuff the thick blankets under the desk, right behind the hardboard curve.
The heavy fabric absorbs the sound vibrations before they hit the microphone. When you tap the top of the desk now, it will sound like a solid block of oak rather than a hollow plastic shell.
The Anchor Sight-Line Measurement Guide
You need to perfectly align the camera, the desk, and the talent. Guessing these measurements leads to weird framing and uncomfortable posture.
Here is the exact formula used by set designers to calculate the reveal angle. The “reveal” is how much of the desk top the camera actually sees.
The 10-Degree Tilt Rule
Your camera should point down at the talent at a slight 5-to-10 degree angle. This requires exact math based on the distance.
- Place the desk exactly 6 feet from the tripod.
- Seat the talent on the stool with a straight spine.
- Measure the talent’s eye level from the floor (this usually sits around 55 inches when seated on a 30-inch stool).
- Place the camera lens exactly at 45 inches high.
- Tilt the tripod head up slightly so the lens focuses on the talent’s eyes.
When you follow these exact steps, the bottom of the lens naturally captures a few inches of the desktop surface. It gives the viewer a distinct sense of physical space in the room.
Integrating a Teleprompter
A true anchor desk setup requires reading scripts directly to the lens. Placing an iPad off to the side on a stand looks amateur. It forces you to look away from the audience.
The Distance Problem
When you mount a teleprompter on your camera lens, you introduce a new visual problem. Reading text from 6 feet away is difficult. If the text is too small, your eyes will dart back and forth across the glass.
This rapid eye movement destroys the authoritative look we just built the desk to support.
The Font Size Solution
You must scale your prompter text aggressively. Set your prompter software margin strictly to the center third of the screen.
Increase the font size until you can only see about three words per line. When the text is massive and centered, your pupils barely move. You look perfectly still and focused on the viewer. You keep your hands resting naturally on the 40-inch desk surface.